How to build a Discord slash command
With Discord becoming an ever larger platform for a variety of communities, there is a constant need to add integrations to such communities. Many of such can already be handled by some off-the-shelf bots, but sometimes you need something more custom. This is where building your own Discord integration comes in.
Now, there is a lot you can and cannot do when building an app for Discord but for this post we’re going to limit the focus to creating a basic / command where when you type, say /ping and click enter, the integration will respond with Pong.
Getting started
To get started you will of course need a Discord account & a server to add this integration to.
Next up, you will need to sign in to the Discord Developer Portal and create a new application. This application will be responsible for handling all the configuration options for this project. Everything from the name of the integration & bot name. What it can and cannot access, etc.
Create an application
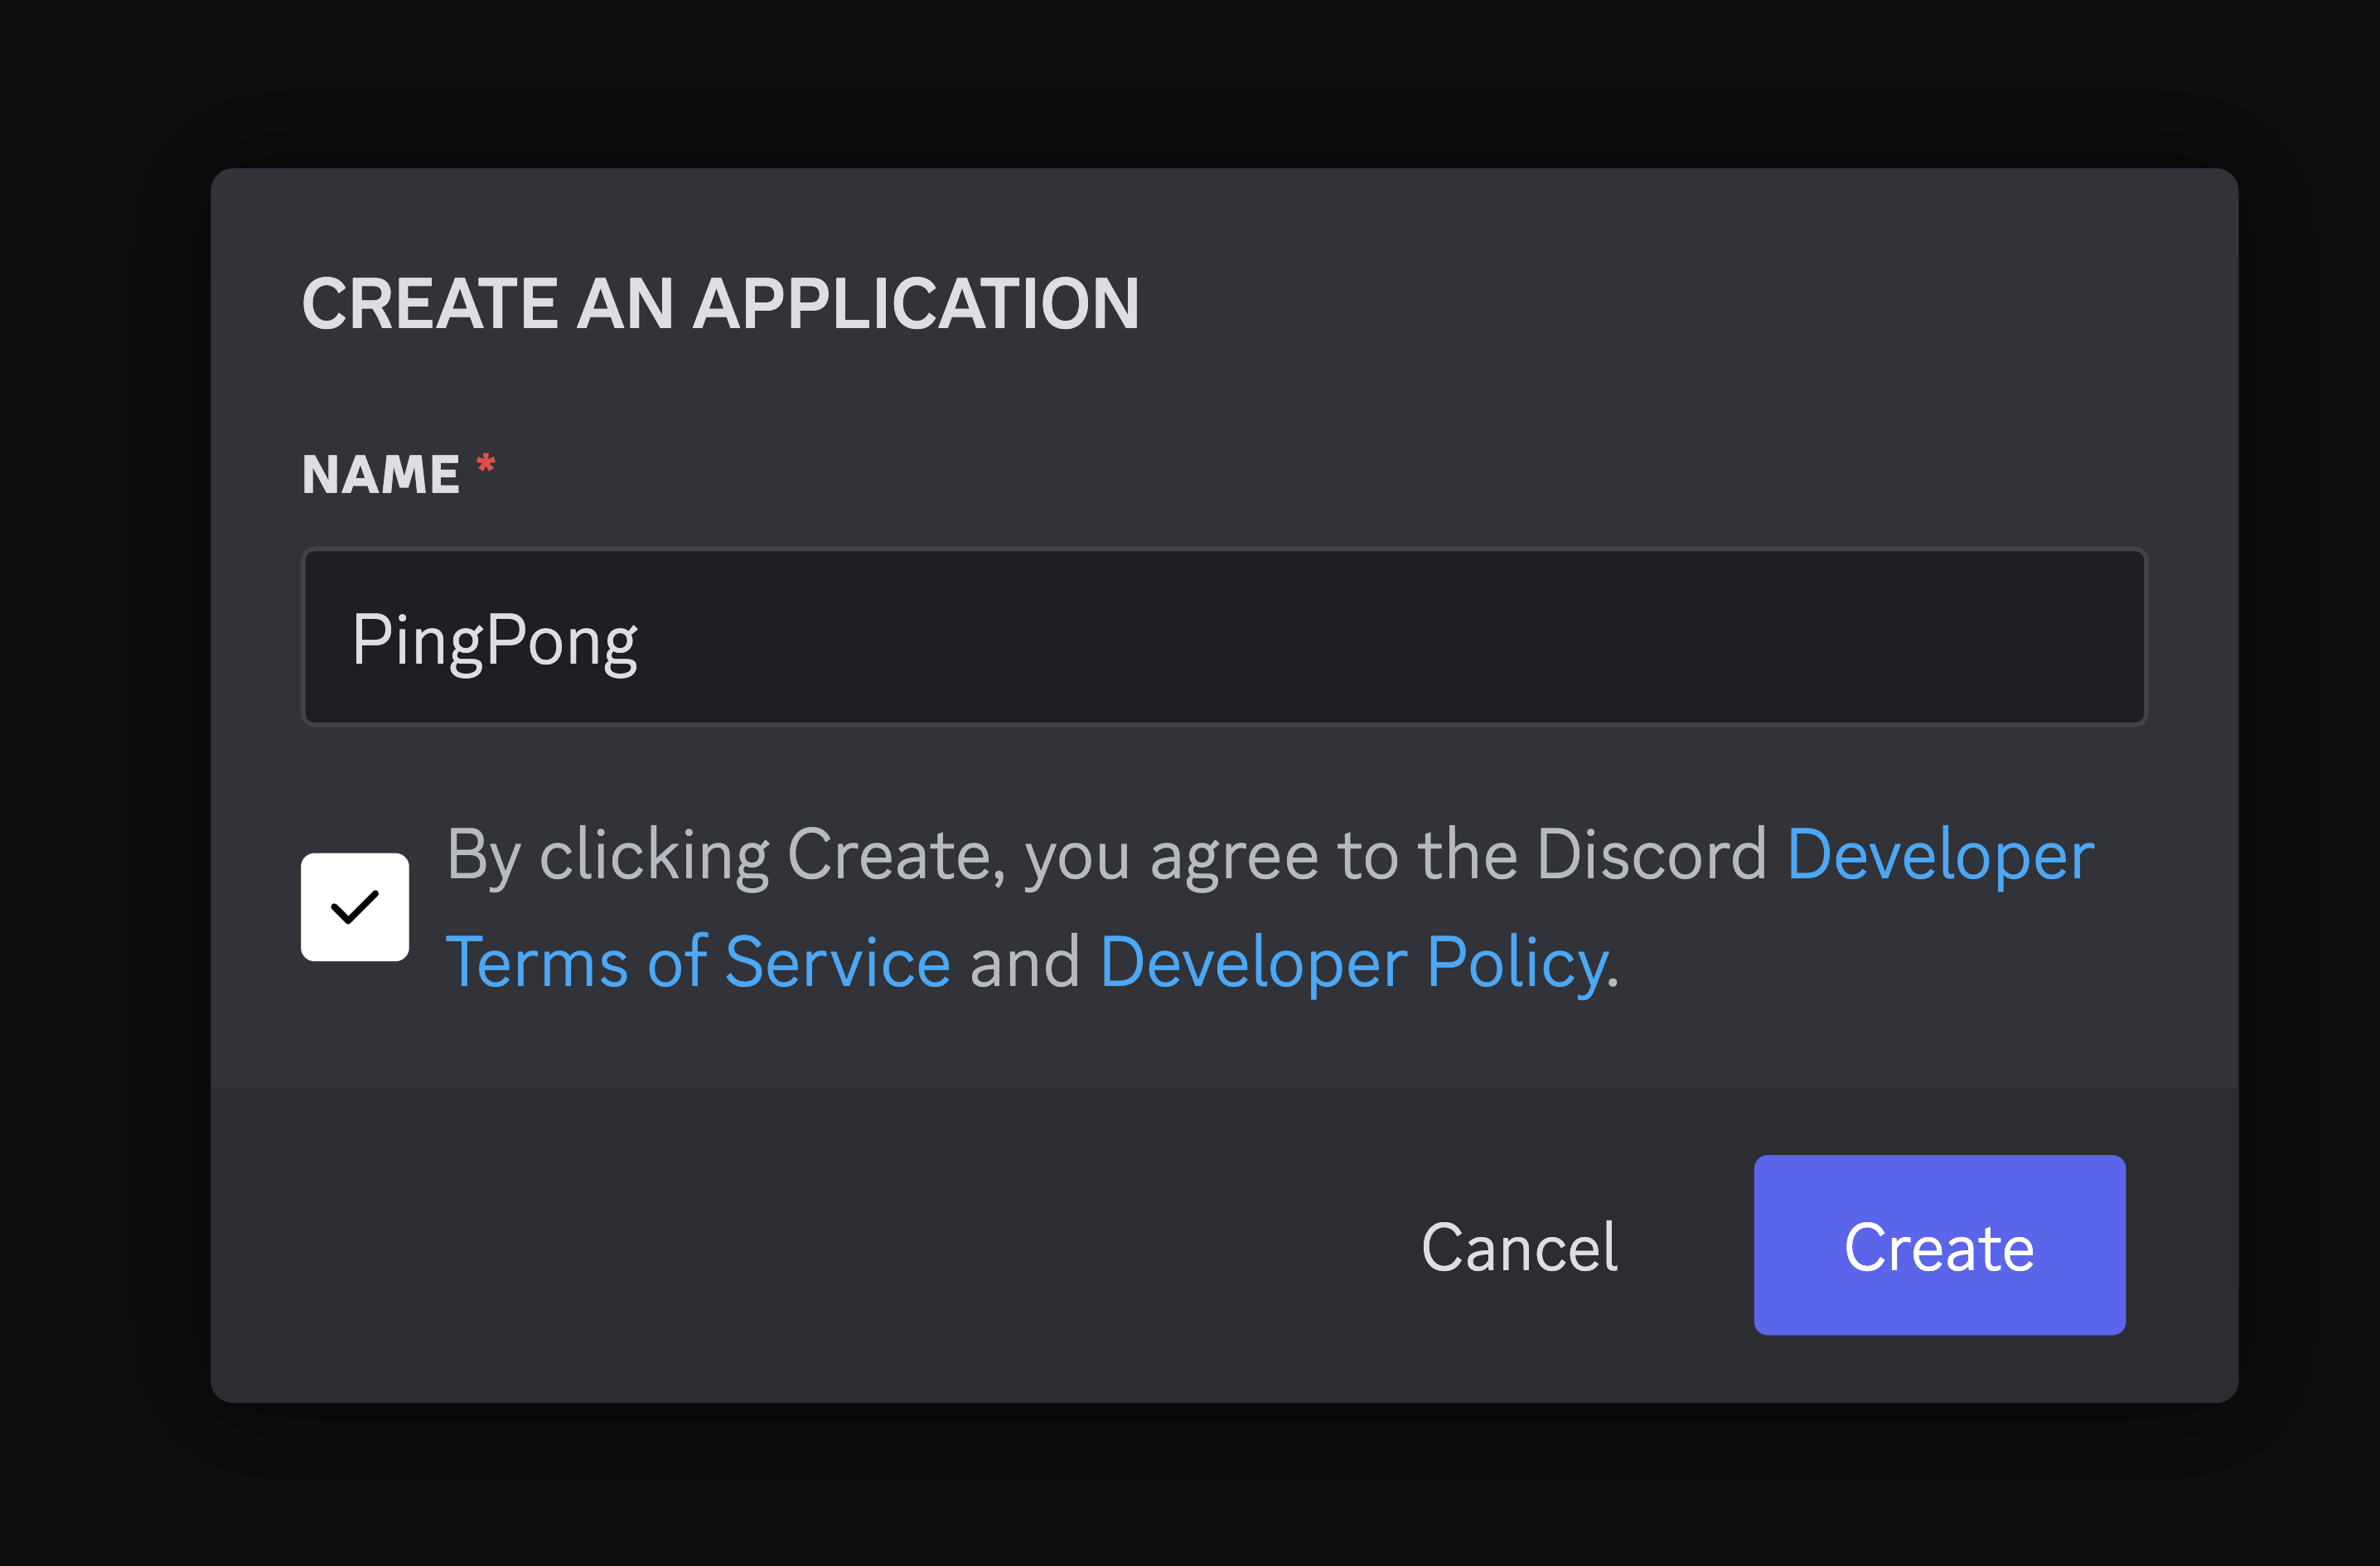
Once logged in, click the “New Application” button in the top right corner. This will open a modal where you can enter the name of your application. This name can be whatever you want, but it’s a good idea to make it something that is easily recognizable for yourself in the future.
In this case I will create an application called PingPong.
Once you’ve created the application, you will be taken to the application’s dashboard. Here you can see the name of the application, application ID, etc.
Configure permissions
With the application created we can now get things ready to add the bot to your server.
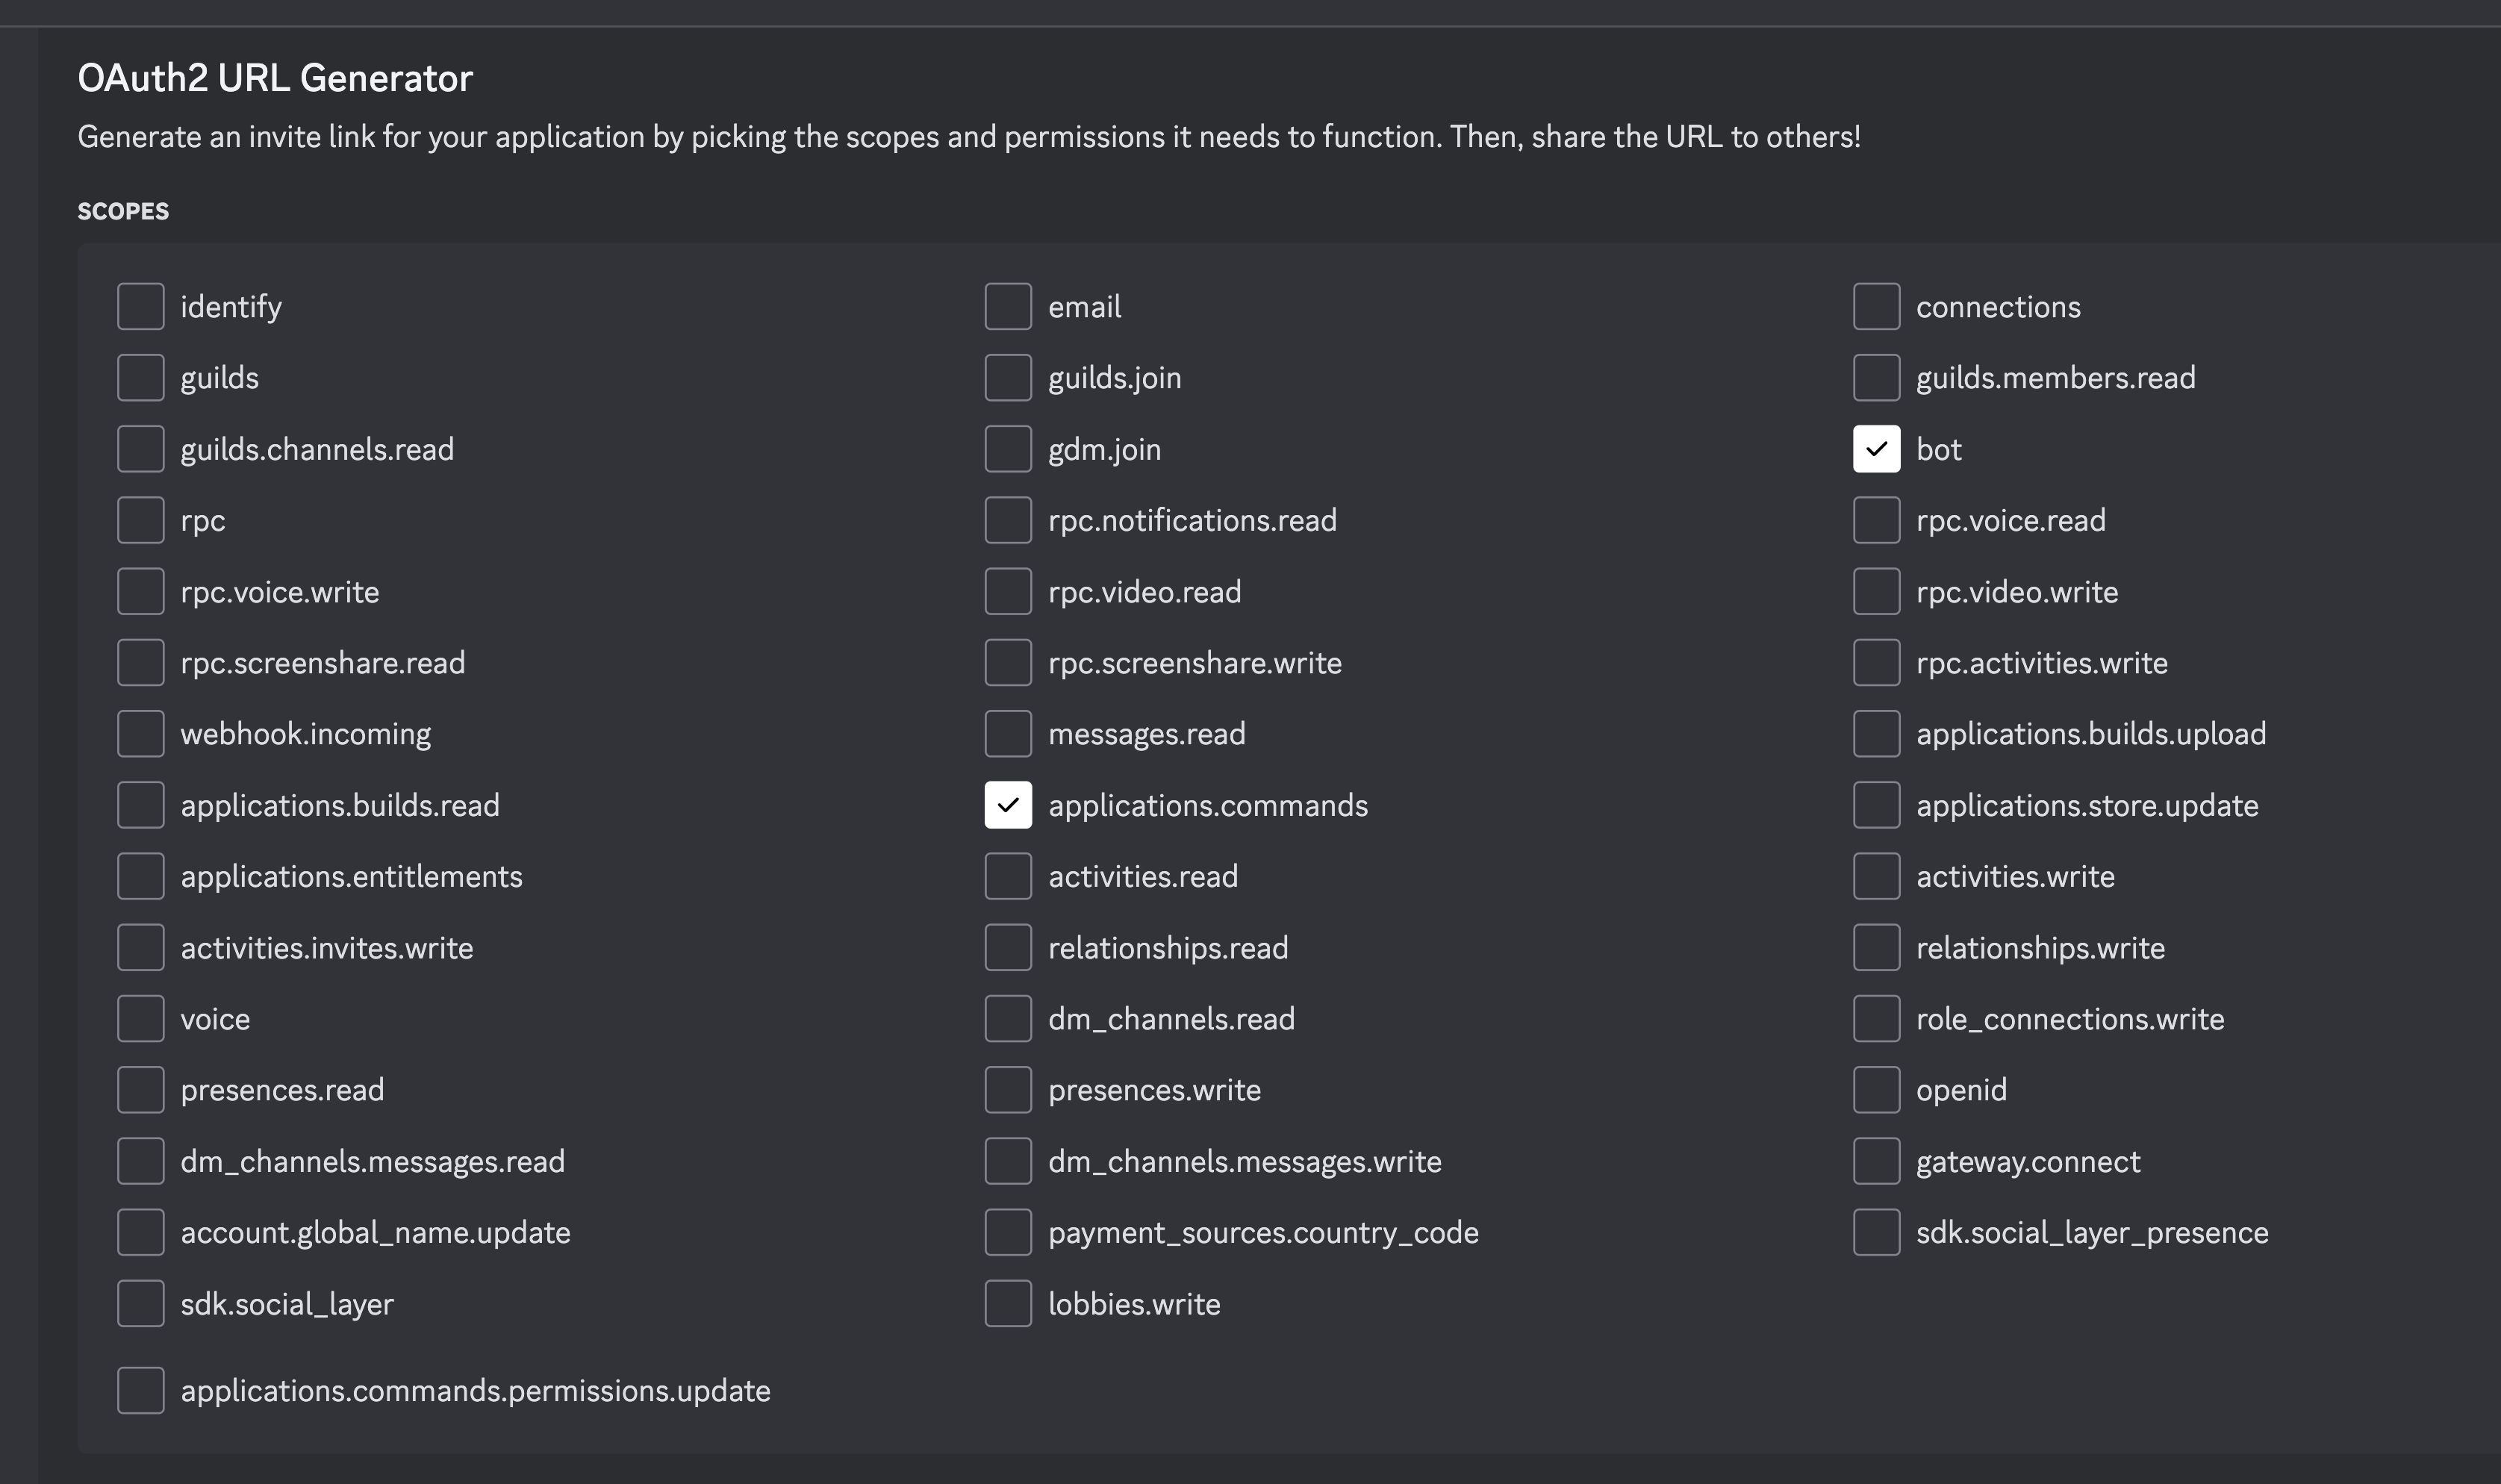
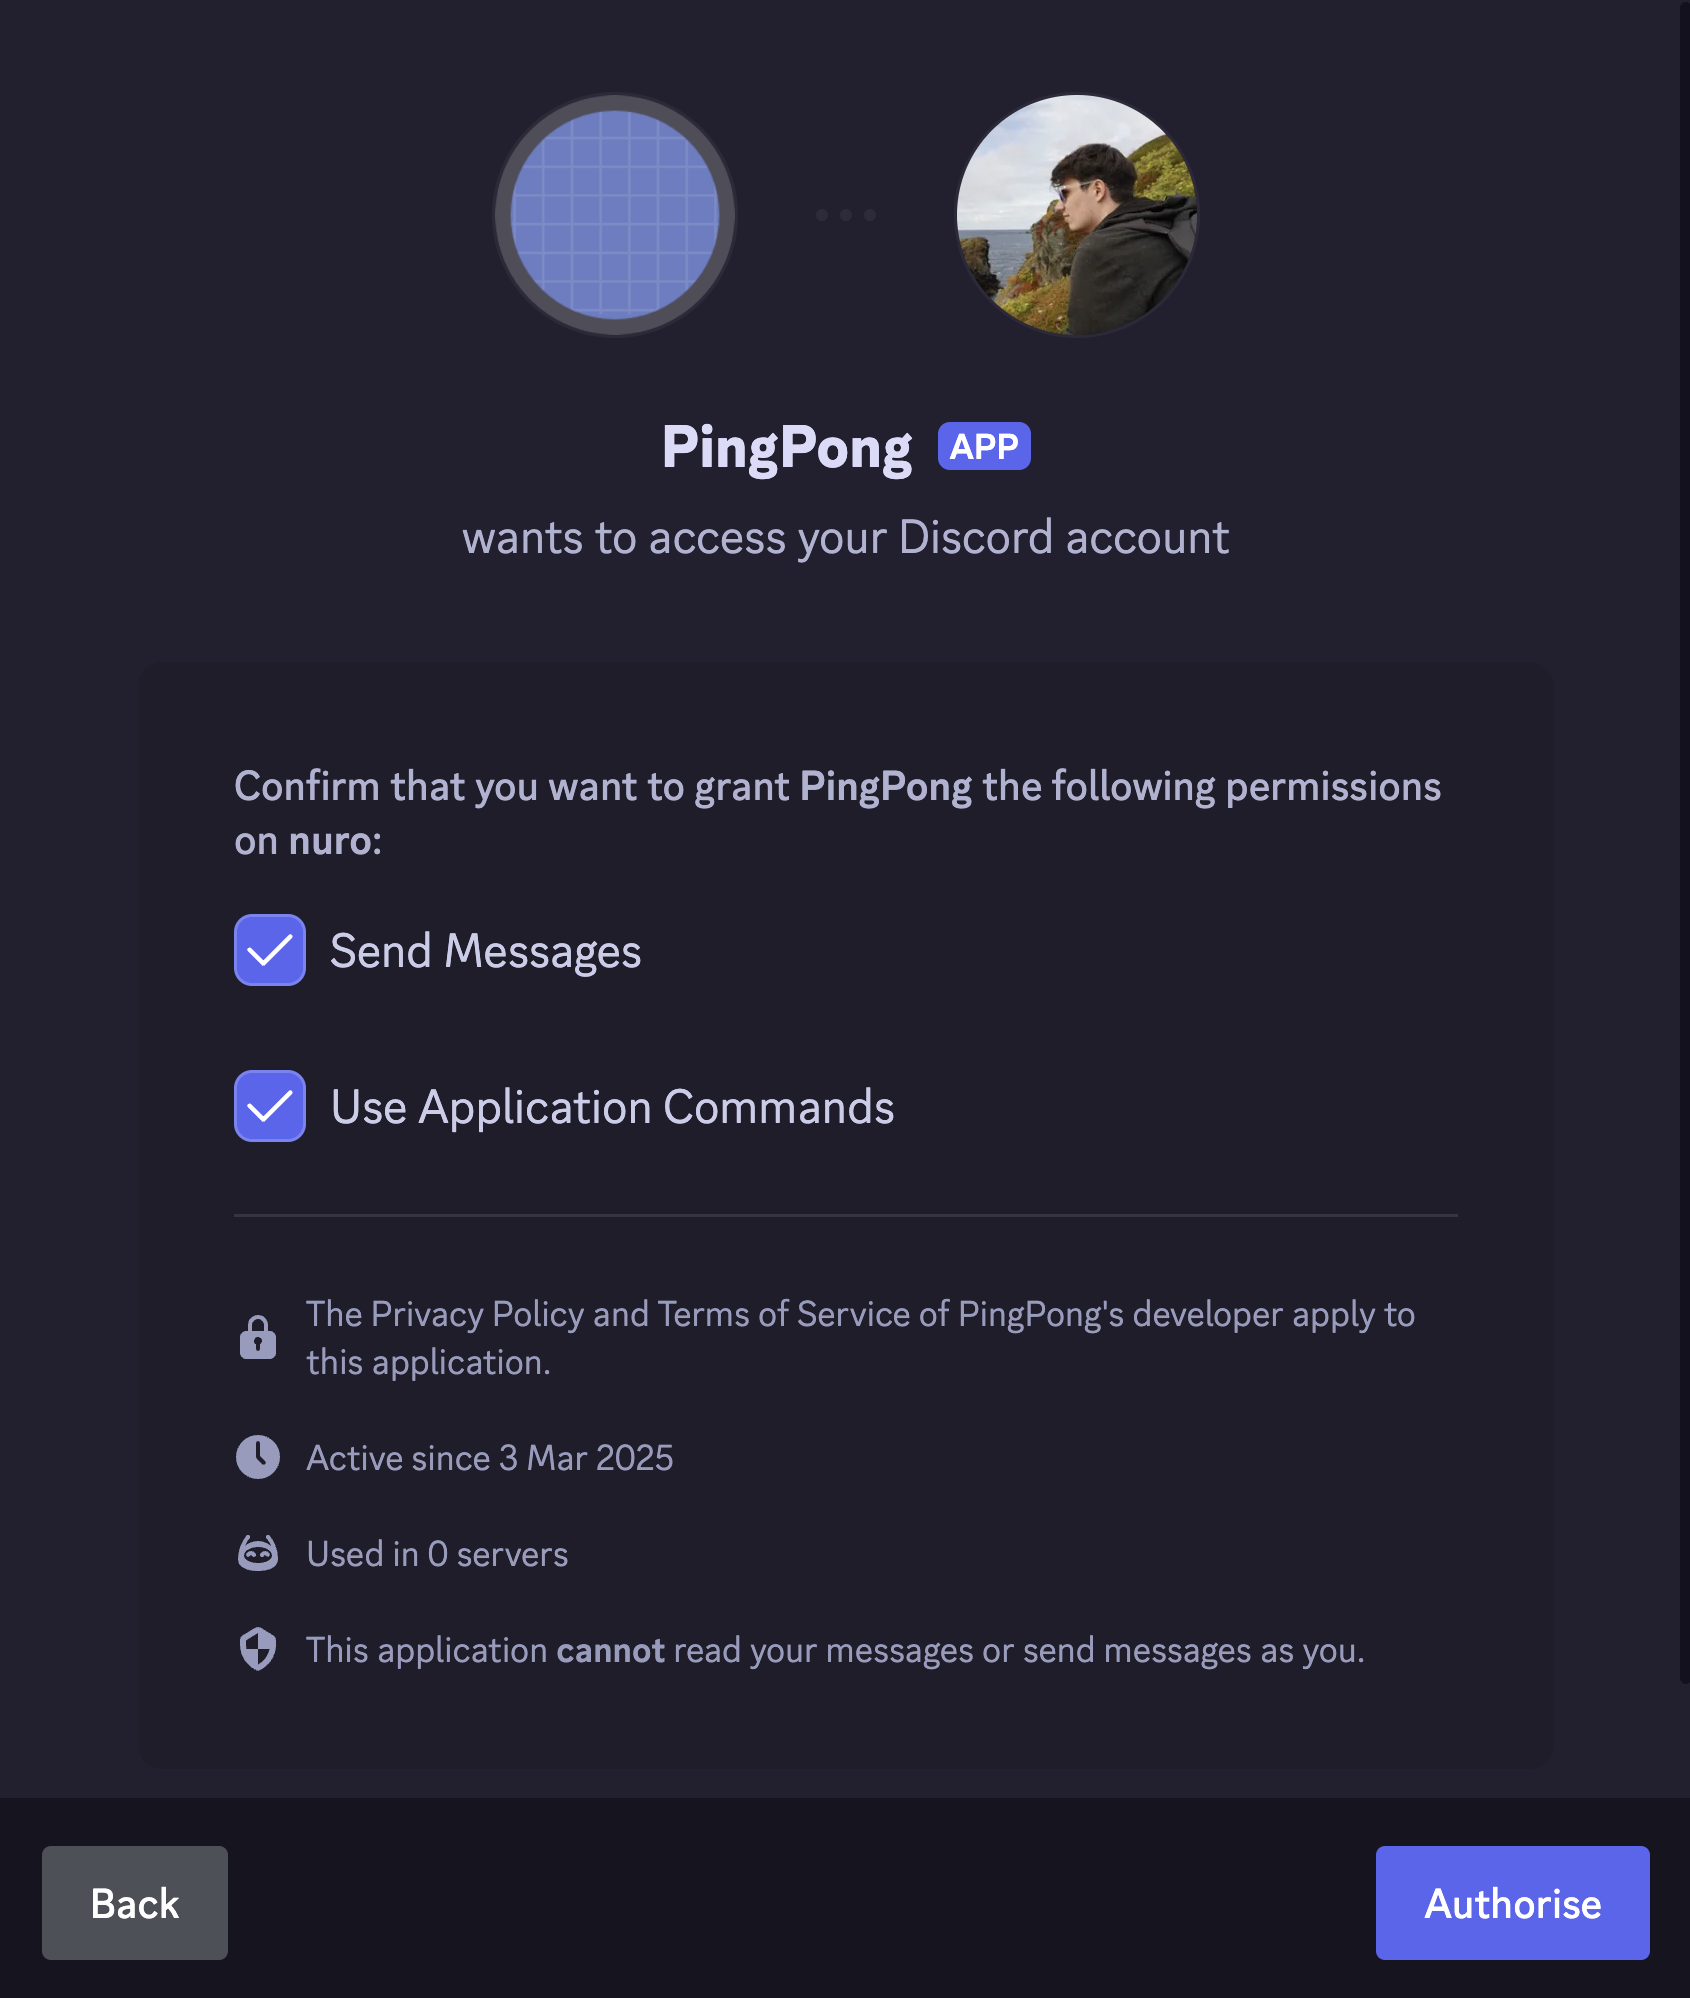
To do this, click on the “OAuth2” tab in the left sidebar. This will take you to a page where you can configure the permissions for the bot.
For this example, we only need 2 scopes:
applications.commands- This allows the bot to create slash commandsbot- This allows the bot to join servers & respond to commands
Below that you can then select the permissions for the bot itself:
Send Messages- This allows the bot to send messages to the serverUse Slash Commands- This allows the bot to use slash commands
Install the bot
Now that all the scopes & bot permissions have been selected, at the bottom of the page where you will see a “Generated URL” section. This URL can be used to invite the bot to your server.
So for now you can go ahead and copy & paste that link it into your browser. This should redirect you to open Discord asking you to select a server to add the bot to.
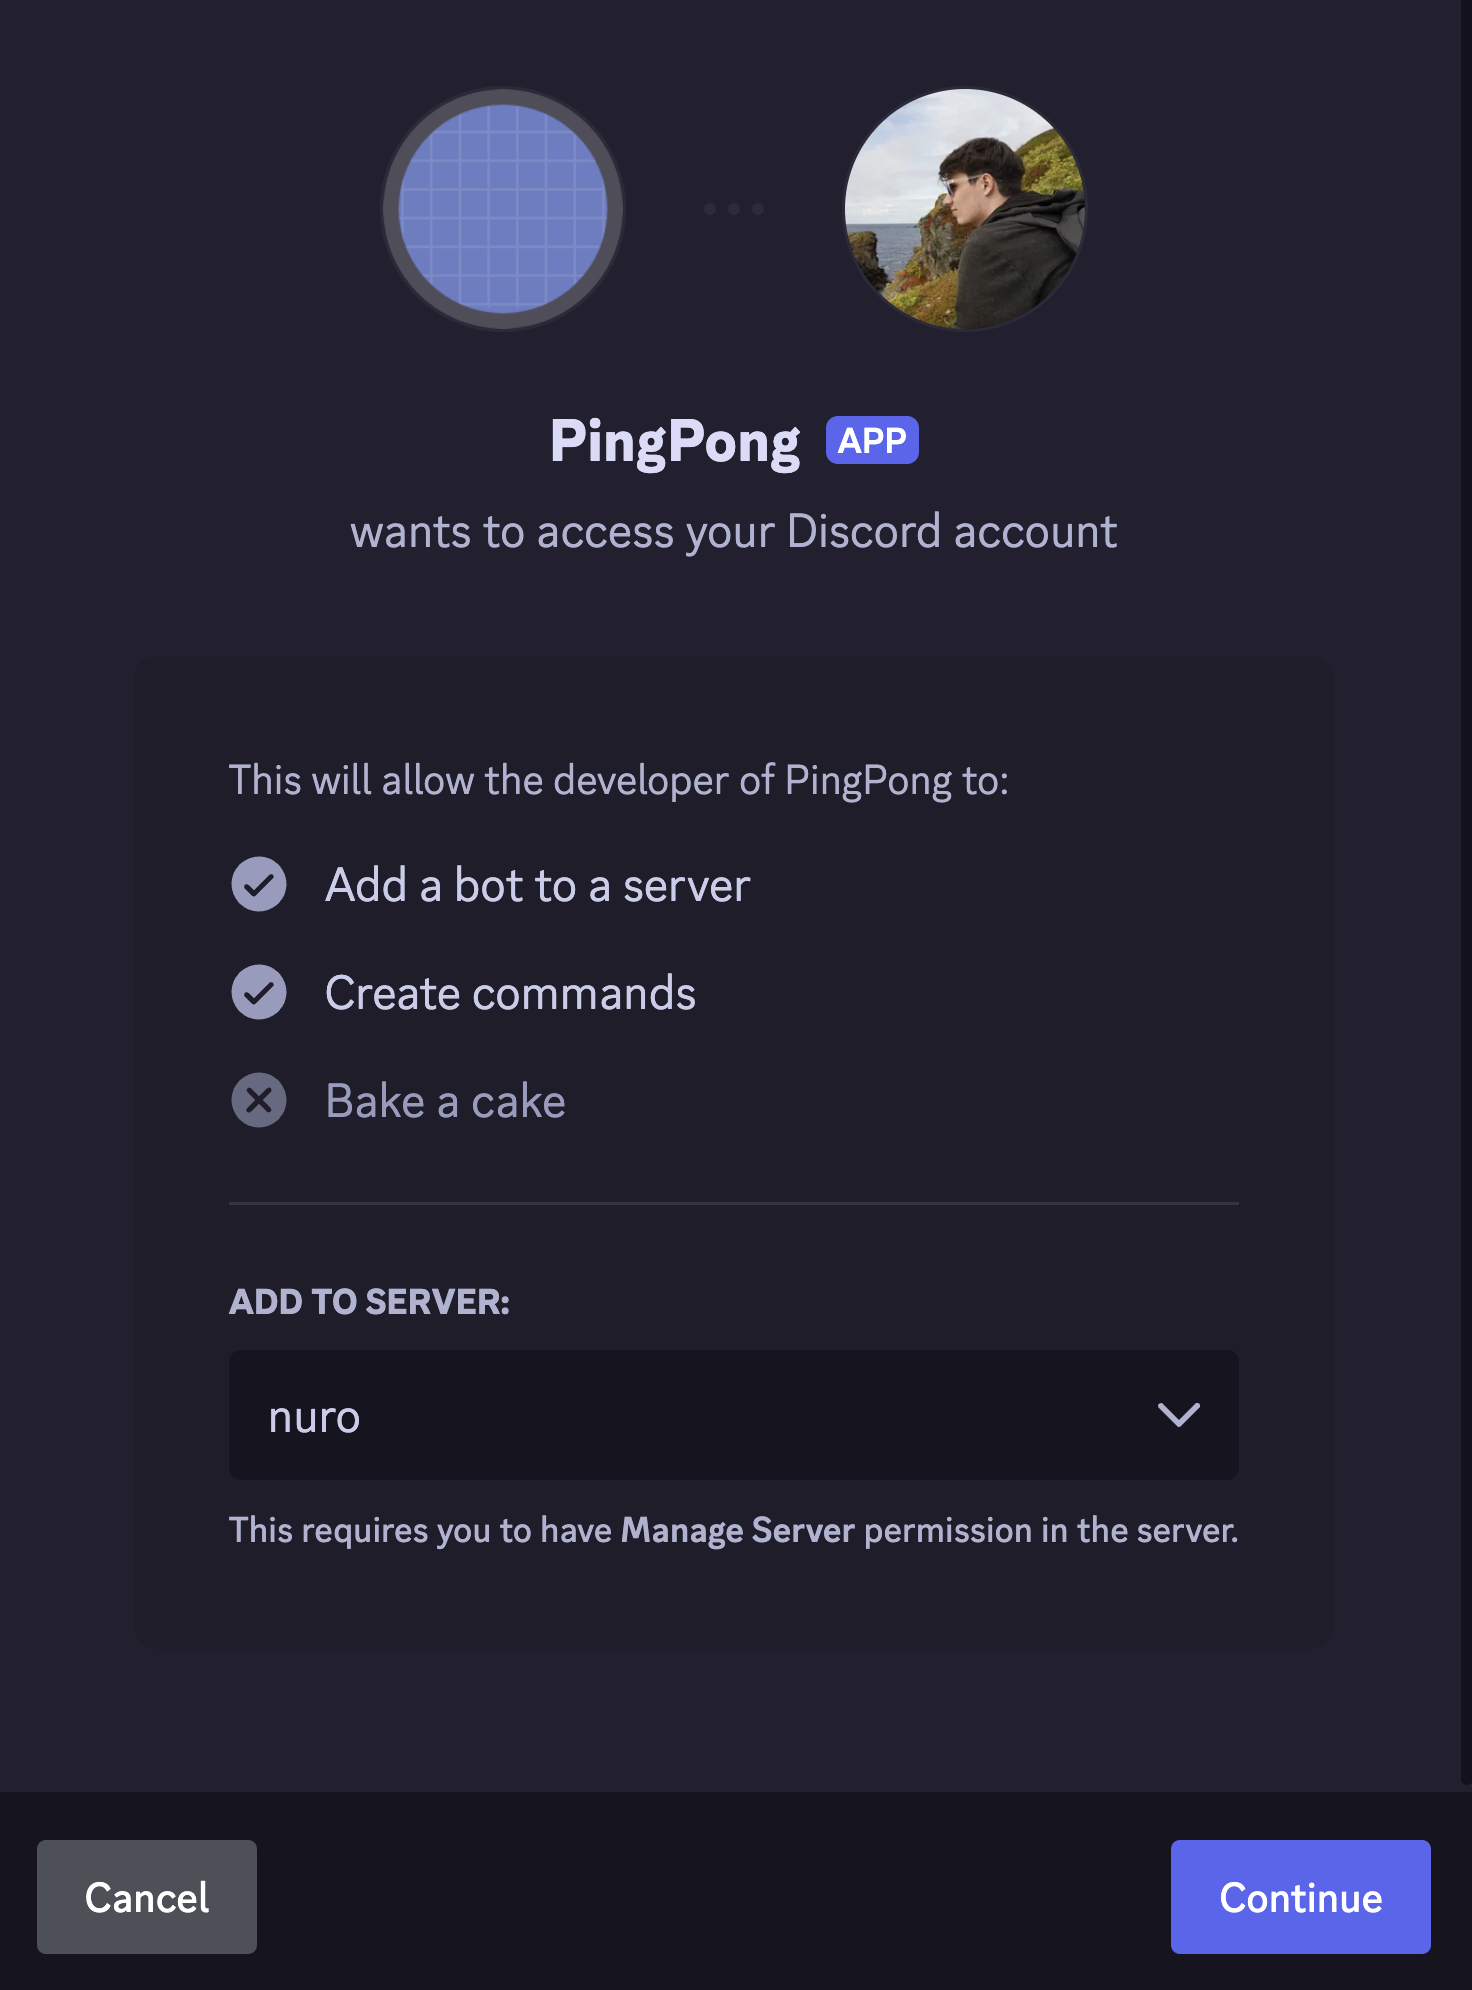
Go through the steps & once you click “Authorize” the bot will be added to your server.
Just like that you now have a bot in your server. But it doesn’t do anything yet. So let’s get to the coding part.
Set up the project
For this project we’re going to be using Bun, but only because it makes setting up and running TypeScript easier. But you can just as easily use Node.js or any other JavaScript runtime.
To get started lets make a new project directory:
mkdir ping-pong && cd ping-pongOnce inside of that directory, we can run the following command to generate all the files we need to get started:
bun init -yMost of these files you can ignore but there is 2 key ones here:
index.ts: This is the entry point of the application & where we will actually write our code.package.json: This is the configuration file for the project, including dependencies, scripts, etc.
Configure secrets
Now, we have some values that we need to keep secret. These are the client ID & token of the bot. We don’t want to hardcode these values into the code as they are sensitive & could be exposed if the code is ever made public.
So in order to get around this we’ll create a .env file to store them all & will not be committed to the repository.
DISCORD_CLIENT_ID: The client ID of the Discord application.- This can be found under the “Client Information” section on the “OAuth2” page in the Discord developer dashboard.
DISCORD_TOKEN: This is the secret token to control the bot.- You can find this under the “Bot” page in the Discord developer dashboard.
- Since you only just created the bot, you will need to click the “Reset Token” button to generate a new token to copy.
Paste these values into the .env file & it should look something like this, where 000 is the placeholder for the actual values:
DISCORD_CLIENT_ID="000"
DISCORD_TOKEN="000"
Install dependencies
With the project pretty much all set up there is one last thing we need to configure and that is adding the dependencies for the project.
In this case we only need one: discord.js. This is a library that allows us to interact with the Discord API.
To install this dependency you can run the following command:
bun add discord.jsBuild the bot
Right, now we can actually write some code!
Open the index.ts file in any editor of your choice. For me I will be using Visual Studio Code.
Let’s start by importing the necessary modules:
import { Client, GatewayIntentBits, REST, Routes, SlashCommandBuilder } from 'discord.js';And then to follow up let’s get the client ID & token from the environment variables:
const { DISCORD_CLIENT_ID, DISCORD_TOKEN } = process.env as Record<string, string>;Note the as Record<string, string>. This is just to tell TypeScript that we know that whatever we get out of this object we know exists and is a string.
Create a slash command
Next up we will create a new slash command with the name ping & description Ping pong!:
const command = new SlashCommandBuilder().setName('ping').setDescription('Ping pong!');If you wanted you could of course change this from ping or Ping pong! to whatever you want. Go nuts!
Register the slash command
With the slash command created, we can now actually register it with Discord so they know what to do when someone types /ping.
To do this we will create a new REST client to interact with the Discord API, set the token, and then refresh the application slash commands:
const rest = new REST({ version: '10' });
rest.setToken(DISCORD_TOKEN);

await rest.put(Routes.applicationCommands(DISCORD_CLIENT_ID), {
	body: [command.toJSON()],
});
Create the bot
Now that the slash command has been created and registered, we now just need to create the bot itself to handle any time the bot gets called or used.
Firstly we’ll need to create a new Discord client instance that logs in using the token we got from the environment variables:
const client = new Client({
	intents: [GatewayIntentBits.Guilds],
});

client.login(DISCORD_TOKEN);
Now we can register listeners for whatever we want.
In this case we’ll first off register a ready listener to know when the bot is ready:
client.on('ready', () => console.info(`Logged in as ${client.user?.tag}!`));Then finally we can register a interactionCreate to run whenever an interaction with the bot happens.
Before we can get the bot to do whatever we want though we need to add one quick check in the listener to see if the interaction that occurred was a command or the command name was not ping, then we know we can ignore it:
With that taken care of we can handle this interaction however we like. In this case we’re just going to use await interaction.reply('Pong!') to respond with Pong!:
client.on('interactionCreate', async (interaction) => {
	if (!interaction.isCommand() || interaction.commandName !== command.name) return;

	await interaction.reply('Pong!');
});
Start it up!
With that all done, you can now run the bot with the following command:
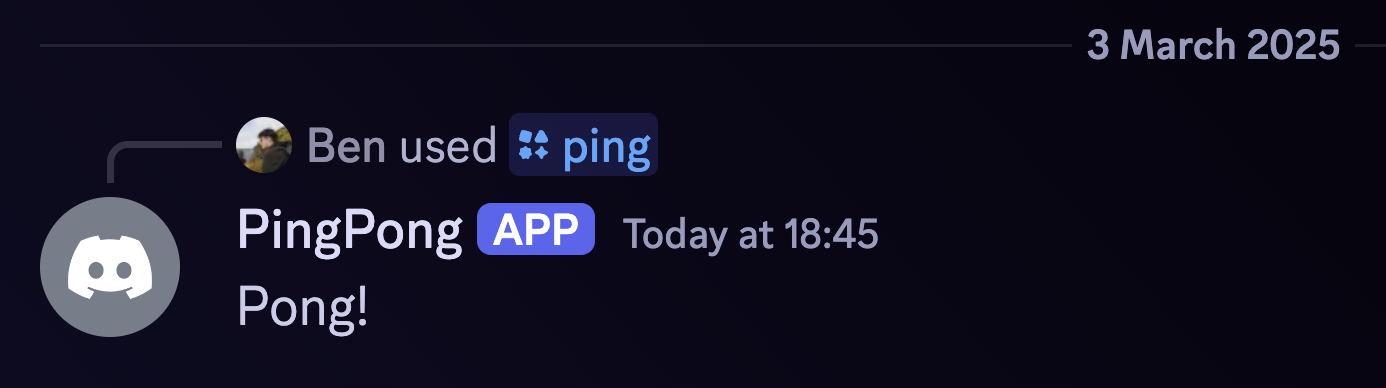
bun run index.tsWhen the bot prints to the console saying Logged in as [BOT_USERNAME], you know you can now go to Discord and type /ping and you should get a response of Pong! like so.